
Wood windows are a timeless feature in many homes, adding warmth, charm, and natural beauty. Over time, however, exposure to the elements, sunlight, and daily wear can cause the wood to lose its luster. If you’re looking to bring your wood windows back to life and enhance their natural appeal, staining can be a simple and effective solution. But before you grab the first can of stain you see, it’s important to know a few tips and tricks to achieve a professional-looking finish.
Discover more expert advice on how to refresh your wood windows with stain—without diving into the technicalities of the application process itself. Whether you’re restoring old windows or adding a personal touch to new ones, these tips will help you get the best results, make your job easier, and ensure your wood windows stay beautiful for years to come.

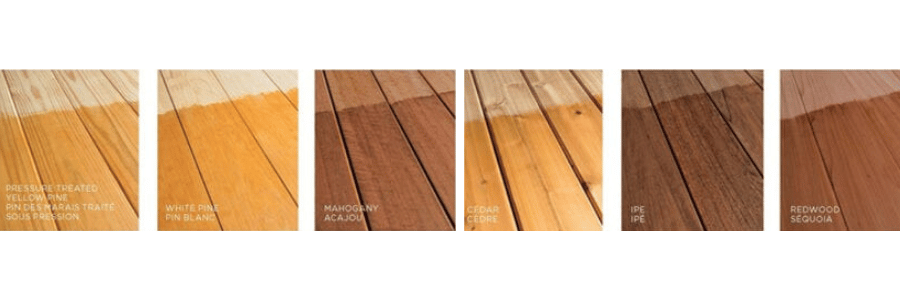
1. Choose the Right Stain for Your Wood Type
Not all wood is the same, and not all stains are suitable for every type of wood. The first step in your staining project is selecting the right stain for the job. There are two main types of stains: oil-based and water-based. Each has its benefits, so understanding the differences will help you decide which one is best for your wood windows.
- Oil-based stains tend to penetrate the wood more deeply and provide a richer, more vibrant color. They’re also more durable, offering better protection against moisture and UV damage. However, oil-based stains take longer to dry and can emit stronger fumes, so proper ventilation is key.
- Water-based stains dry faster, have less odor, and are easier to clean up, making them a popular choice for indoor projects. However, they may not provide the same depth of color as oil-based stains and may require more frequent reapplication over time.
In addition to stain type, consider whether you need a pre-stain wood conditioner—especially if you’re working with softwoods like pine, which tend to absorb stain unevenly. A conditioner ensures a more uniform finish, so your wood windows look smooth and polished.
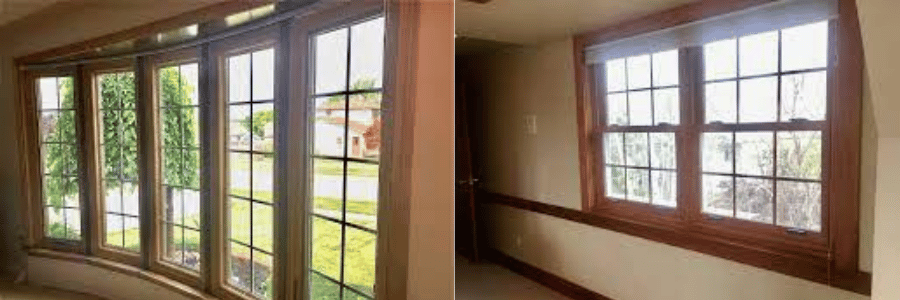
2. Match the Stain Color to Your Home’s Aesthetic
One of the most exciting parts of staining wood windows is the opportunity to choose a stain color that complements your home’s interior design. Whether you prefer a rich mahogany or a light, natural oak finish, the stain color you select should enhance the style of your space.
- Darker stains (like walnut or espresso) add sophistication and work well in traditional, rustic, or contemporary spaces. They also tend to hide imperfections better, making them a great choice for older or distressed wood.
- Lighter stains (like honey, oak, or maple) bring out the natural grain of the wood and are perfect for creating a bright, airy feel in more modern, Scandinavian, or coastal-inspired interiors. Lighter stains can also help make smaller rooms feel more open and spacious.
Before committing to a color, test the stain on a small, inconspicuous section of the window. Different wood types absorb stain differently, so the same color may look slightly different depending on your wood species.

3. Consider the Level of Protection You Need
Staining not only adds color to wood windows but also helps protect them from the elements. However, to maximize the durability of your stained wood, you should consider applying a protective finish after staining. A polyurethane or varnish finish will seal the stain and provide an extra layer of protection against moisture, UV rays, and scratches.
- Polyurethane is the most common finish for wood windows, offering excellent durability and a glossy or satin sheen. If your windows are exposed to harsh sunlight or weather conditions, a high-quality polyurethane can help prevent fading and cracking over time.
- For a more natural look, oil-based finishes can provide a beautiful, matte sheen that preserves the wood’s natural texture without the high gloss of polyurethane.
If your windows are interior-facing and not exposed to much wear, you may opt for a less durable finish, such as a wood wax or shellac, which can give the wood a more natural, soft look while still providing some protection.

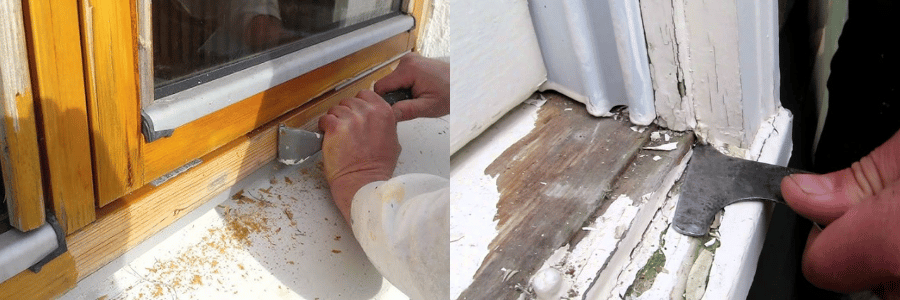
4. Don’t Skip the Prep Work
Proper preparation is key to achieving a smooth, even finish. Taking the time to properly clean, sand, and condition your wood windows before applying stain will pay off in the final result. Clean off any dirt, dust, or grease from the surface, and be sure to lightly sand the wood to remove any old finish or rough spots. A clean, smooth surface allows the stain to penetrate evenly, preventing blotchy or streaky areas.
If you’re dealing with older windows that have been painted, you may need to remove the old paint before staining. Use a paint stripper or sander, but be sure to follow the product instructions and take proper safety precautions. Be patient—it may take some time to get the wood back to its natural state, but the final result will be worth it.
5. Control the Environment
The environment in which you stain your wood windows can impact the outcome of your project. Factors like temperature, humidity, and airflow play a significant role in how the stain will dry and adhere to the wood.
- Temperature: Ideally, stain should be applied in a temperature range of 50°F to 90°F (10°C to 32°C). Too cold or too hot, and the stain may not apply properly, leading to an uneven finish.
- Humidity: Humidity can cause wood to swell or warp, which can interfere with the staining process. If you’re staining windows indoors, try to do so on a dry day to ensure the best results.
- Airflow: Proper ventilation is essential when working with oil-based stains, as they can release fumes. Make sure your work area is well-ventilated and that you’re wearing appropriate safety gear, such as gloves and a mask, to avoid inhaling harmful chemicals.
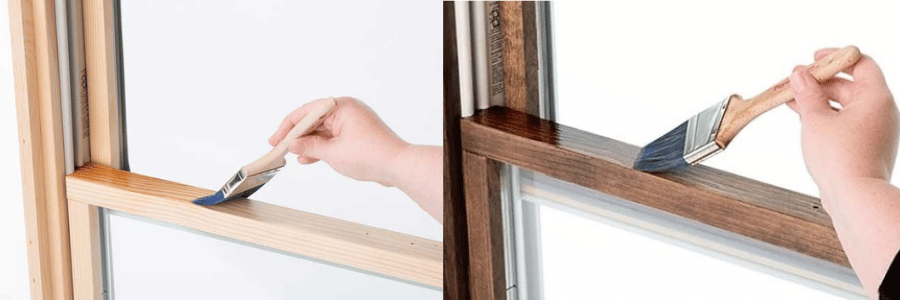
6. Apply Stain in Layers, Not All at Once
When it comes to applying stain, patience is key. Don’t try to slather on the stain all at once. Instead, apply it in thin, even layers, allowing each layer to dry before adding the next. This will give you more control over the final color and help prevent streaks or blotches.
- For a deeper, more uniform color, you can apply multiple coats of stain. Just make sure to wait the recommended drying time between coats, and always wipe off any excess stain after each application to avoid buildup.
- If you want to lighten the color, you can always rub the surface with a clean cloth or rag to remove some of the stain after applying it.
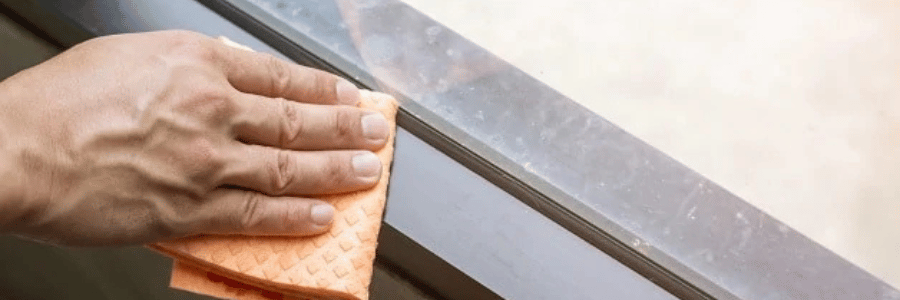
7. Protect Your Stained Wood Windows
Once your stained wood windows are finished, it’s important to protect them from dirt, moisture, and direct sunlight. A good-quality finish will help shield the wood from these elements, but regular maintenance is essential to keeping your windows looking their best. Periodically clean your windows with a soft cloth and mild cleaner, and reapply a fresh coat of finish as needed, especially if you notice signs of wear or fading.
Final Thoughts
Staining your wood windows is a fantastic way to refresh their appearance, enhance the grain, and add a touch of personality to your space. By choosing the right stain, carefully preparing the surface, and following these expert tips, you’ll achieve a professional-looking finish that will last for years to come. Whether you’re looking to restore vintage windows or give new ones a custom touch, staining is a simple, effective way to elevate your home’s interior or exterior.